Ingredients
Equipment
Method
MAKE THE DOUGH
- Step 1 — Activate the yeast in warm milk. Measure the milk and warm it gently until it feels like comfortable bathwater — around 38–40°C. If it feels hot to the touch, let it cool for a minute before proceeding, as temperatures above 46°C will kill the yeast entirely. Pour the warm milk into your mixing bowl, add the instant yeast and sugar, and stir gently with a spoon. Let the mixture sit for 2 minutes — you should see small bubbles beginning to form at the surface. If using active dry yeast, wait the full 5 minutes until the surface looks visibly foamy before adding any flour. A yeast mixture that shows no activity after 5–7 minutes means the yeast is dead and the batch should not be continued — start fresh with new yeast rather than proceed and waste the rest of your ingredients.
- Step 2 — Form the initial dough. Add the bread flour and the room-temperature egg to the milk and yeast mixture. Using a wooden spoon or your mixer on its lowest speed, combine everything until no dry flour remains and a rough, shaggy dough forms. The dough will look sticky, almost uncomfortably so, and this is exactly correct — resist the urge to add extra flour. Adding flour at this stage will produce a tight, dense dough that will not develop the open, springy crumb that defines this style of donut. The stickiness resolves itself entirely during the kneading process.
- Step 3 — Knead in the butter and develop the gluten. Add the softened butter to the rough dough and begin kneading — by hand on a clean surface, or in the stand mixer with the dough hook on medium speed. This step takes 15 to 20 full minutes and cannot be shortened. At first the butter will seem to fight the dough, making it look greasy and even more impossibly sticky. After about 5 minutes, it will begin to smooth out. After 10 minutes, it will look silky and begin to pull away from the sides of the bowl. The dough is ready when it passes the windowpane test: pull a small piece between your fingers and stretch it gently — if it stretches thin enough to see light through without tearing, the gluten is fully developed. If it tears immediately, knead for another 5 minutes and test again. This gluten development is what gives the finished donut its cloud-soft, springy, almost pillowy texture.
FIRST RISE
- Step 4 — Proof the dough until doubled. Shape the dough into a smooth ball by pulling the sides underneath and rotating on the counter. Place it seam-side down in a lightly oiled bowl large enough to accommodate twice the volume. Cover the bowl tightly with plastic wrap — not a towel, which allows too much moisture to escape — and place it somewhere warm. An oven with just the light on (no heat) works perfectly. Let the dough proof for 2 full hours, or until it has genuinely doubled in size and looks visibly puffy and aerated. Do not rush this rise by increasing temperature — slow, steady proofing at around 27–30°C builds flavor in the dough. If your kitchen is cold, the rise may take up to 2.5 hours, and that is completely fine.
SHAPE AND SECOND RISE
- Step 5 — Shape and cut the donuts. Gently deflate the risen dough by pressing down with your hands — do not punch aggressively, as you want to preserve some of the air structure. Turn it onto a clean, lightly floured surface and use your hands or a rolling pin to pat and press it into an even rectangle approximately 2cm thick. Using your round cutter, press straight down without twisting to cut each donut — twisting seals the cut edges and prevents the sides from rising freely. Place each cut round on its own square of parchment paper on a baking sheet. Gather the scraps, let them rest for 5 minutes to relax the gluten, then re-roll and cut the remaining pieces.
- Step 6 — Second proof. Loosely drape a clean kitchen towel over the tray of shaped donuts and leave them to proof again for 30 to 45 minutes at room temperature. They should look noticeably puffier and feel light and airy to the touch. The poke test confirms readiness: press a floured fingertip lightly into the side of a donut — it should leave a shallow indent that slowly and gently springs back over 3 to 5 seconds. If it springs back instantly, it needs more time. If the indent stays and doesn't spring back at all, it is slightly over-proofed but still fryable — proceed quickly.
FRY THE DONUTS
- Step 7 — Fry to deep golden brown. Fill your deep pot with enough neutral oil to submerge the donuts — at least 3 inches of depth. Heat the oil over medium heat to exactly 170°C (340°F), measuring with your thermometer. This temperature is lower than most donut recipes because the enriched milk bread dough needs more time to cook through without burning the outside. Working in batches of 3 to 4 donuts at a time, lower each donut into the oil by holding the parchment square and gently submerging it — the parchment will release from the dough within seconds, at which point you can remove it with tongs. Fry for approximately 2 minutes per side, turning once, until both sides are a rich, even golden brown. Transfer to a wire rack and monitor your oil temperature between batches — it drops when cold dough goes in and climbs when donuts come out, so adjust the heat accordingly.
MAKE THE CREAM FILLING
- Step 8 — Whip the milk cream to stiff peaks. While the donuts cool on the rack, prepare the cream filling. Pour the cold heavy whipping cream into a clean, chilled mixing bowl (30 minutes in the freezer beforehand makes a real difference in how quickly and stably it whips). Add the sifted powdered sugar. Start your electric mixer on its lowest speed to prevent the cream from spraying, then gradually increase to high speed. Whip until the cream holds firm, upright peaks that do not slump or droop when the beaters are lifted — this is stiff peaks stage. Stop immediately when you reach this point. Over-whipped cream turns grainy and yellow and cannot be salvaged. Transfer the whipped cream to your piping bag fitted with a large round tip and refrigerate until ready to use.
ASSEMBLE AND FINISH
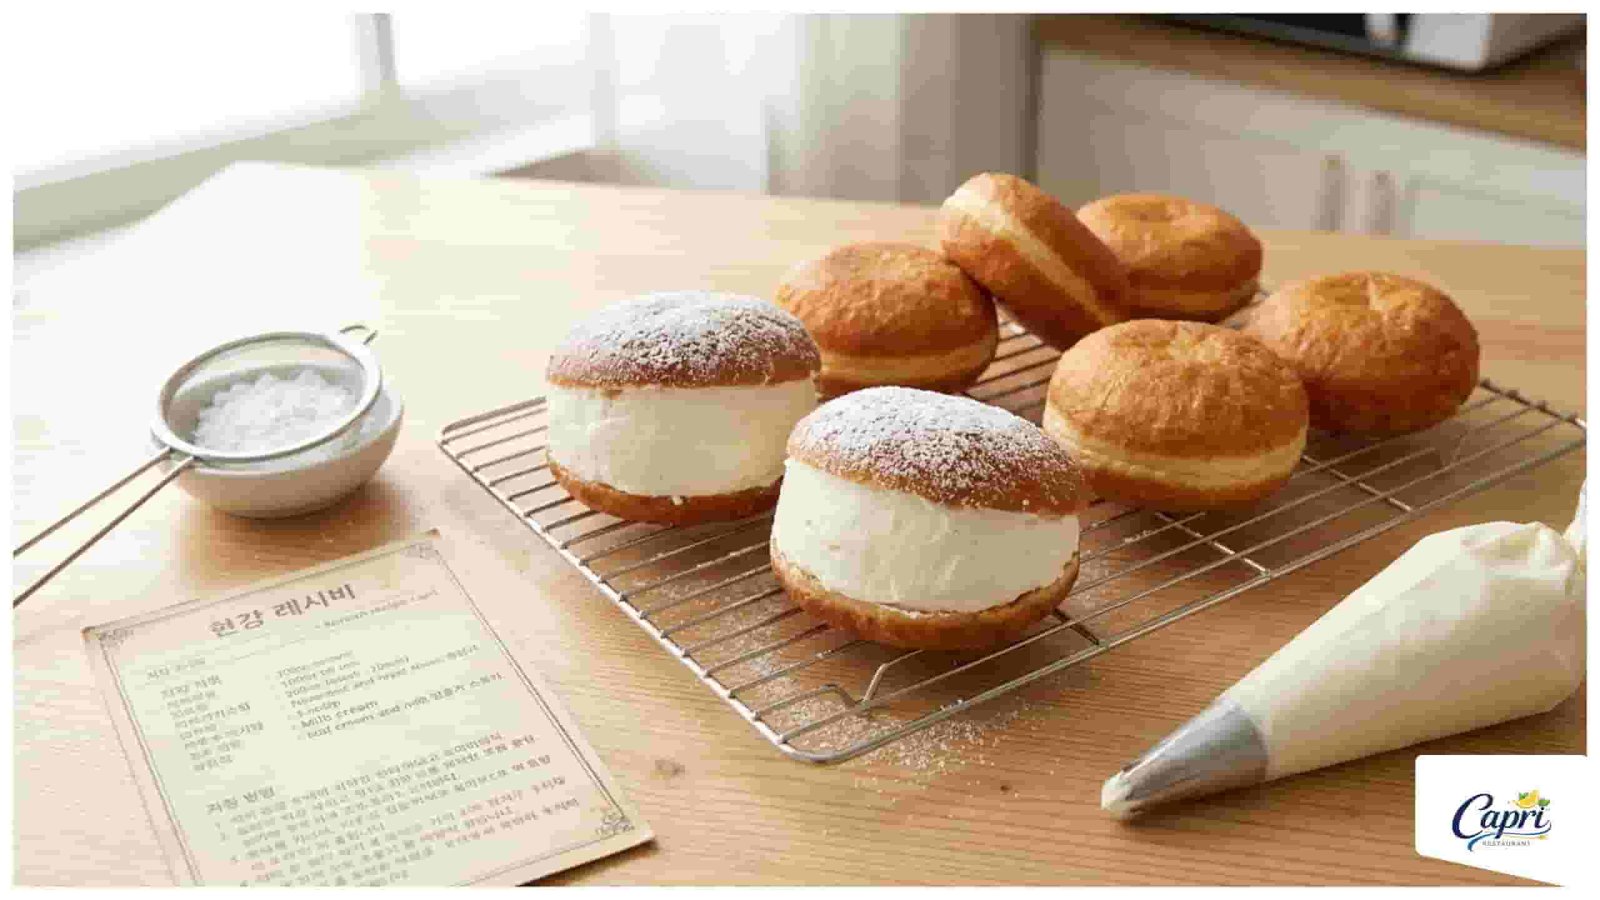
- Step 9 — Fill, finish, and serve. Wait until the donuts are fully cooled to room temperature before filling — even residual warmth will cause the cream to melt and leak. Using a sharp serrated knife, slice each donut horizontally, cutting about two-thirds of the way through and opening it like a book, or slicing cleanly in half. Use a pastry brush or a spoon to generously coat the inside cut surfaces of each donut with sweetened condensed milk. Take the piping bag from the refrigerator and pipe a generous, tall swirl of cream onto the bottom half of each donut — more than you think is necessary is exactly right. The authentic Korean bakery version is famously abundant with cream. Place the top half back on, dust the finished donuts with a generous snowfall of powdered sugar, add fresh berries if using, and serve immediately. These are best in the first 30 minutes after filling.
Video
Notes
- The 15–20 minute knead is the whole ballgame: Every quality issue specific to this style of donut — dense crumb, poor rise, torn texture, flat sides — traces to under-developed gluten. The windowpane test is your only reliable guide. Do not rely on time alone; knead until the dough genuinely stretches thin and translucent without tearing, regardless of how long that takes.
- Use bread flour, not all-purpose: The 1–2% higher protein content in bread flour creates a meaningfully different gluten structure — one that is more extensible, more elastic, and more capable of trapping the gas produced during proofing. All-purpose flour works in an emergency but produces a noticeably softer, less structured crumb that tears more easily and doesn't achieve the same cloud-like bounce.
- Oil temperature is your frying compass: 170°C (340°F) is the sweet spot specifically for enriched milk bread dough. Higher heat (180°C+) will brown the outside before the inside is cooked through. Lower heat produces pale, greasy donuts that absorb more oil than they should. Check and adjust between every batch — the oil rises in temperature when donuts are removed and drops when new cold dough goes in.
- How to know when they're done: A properly fried donut will be a deep, even golden brown on both sides, feel light when lifted (not heavy with absorbed oil), and register approximately 88–90°C (190°F) on an instant-read thermometer inserted into the center. The sides should have a slightly paler band around the equator — this is the surface that sat at the oil line and is completely normal.
- Cool completely before filling — no shortcuts: Even 10 degrees of residual warmth in the donut crumb will begin to melt the whipped cream from the inside out. The cream will liquify, pool, and make the inside of the donut soggy within minutes. A fully cooled donut holds the cream firmly for up to an hour at room temperature.
- Variation — Chocolate milk cream: Add 2 tablespoons of sifted Dutch-process cocoa powder to the cream before whipping, and brush the inside of the donut with Nutella instead of condensed milk. The filling becomes a chocolate-forward, truffle-adjacent experience.
- Variation — Matcha cream: Add 1½ teaspoons of high-quality culinary matcha powder to the powdered sugar before whipping into the cream. Brush the inside of the donut with a thin layer of sweetened red bean paste (anko) before filling. The bittersweet matcha and the earthy sweetness of red bean is a combination deeply rooted in East Asian bakery tradition.
- Variation — Strawberry cream: After whipping the cream to stiff peaks, gently fold in 3 tablespoons of freeze-dried strawberry powder for color, flavor, and a concentrated fruitiness that fresh berries alone cannot achieve. Finish with a fresh strawberry slice on top of each filled donut.
- Variation — Baked (not fried): Place the second-proofed donuts on a parchment-lined baking sheet and bake at 180°C (355°F) for 12–14 minutes until light golden. The exterior will be softer and paler than the fried version, and the crumb will be slightly more bread-like, but the filling and overall flavor remain very good. This is a meaningful calorie reduction and a practical option if you prefer to avoid frying.
- Make-ahead instructions: The dough can be made through the shaping step, placed on parchment squares on a covered baking sheet, and refrigerated overnight (up to 16 hours). The next day, bring the shaped donuts to room temperature for 45–60 minutes — they will complete their second proof during this time — then fry as directed. The overnight cold proof actually develops more complex flavor in the dough.
- Storage: Unfilled donuts keep in an airtight container at room temperature for 1 day, or refrigerated for up to 2 days. Reheat unfilled donuts in an air fryer or toaster oven at 150°C (300°F) for 3–4 minutes before filling — this refreshes the exterior without drying the crumb. Filled donuts must be refrigerated and are best consumed the same day they are assembled. The cream softens the crumb over time and the donut becomes soggy by day two.
- Freezing: Unfilled, fully cooled donuts freeze well for up to 1 month — wrap each individually in plastic wrap before placing in a freezer bag. Thaw at room temperature for 1 hour, warm briefly in the oven, then fill and serve. Do not freeze cream-filled donuts, as the cream collapses and weeps on thawing.
- Scaling note: This recipe makes 8 donuts, which is ideal for a family or small gathering. For a party of 12–16, double the dough recipe and work in two batches during the fry stage to maintain oil temperature control. The cream filling quantity can be scaled proportionally — 80g of cream per donut is a generous working ratio.